How to Repair VHD File: A Complete Guide to Recover Corrupted Virtual Disk Files
Summary: Today from this blog I will be discussing with you all the ways or methods to repair VHD files manually” and the reasons that can cause corruption in VHD files.
Are you annoyed with the corruption in the VHD file and looking for a solution? If yes then you have come to the right place and this blog is for you because today from this article I will be discussing with you the ways to repair VHD files manually so let’s get started
What Is a VHD file?
As we know that VHD file stands for Virtual Hard Disk file it is considered a file format that is used to represent a virtual hard disk drive. It is also known as Virtual Machines and is used for storing all the contents of a hard drive be it disk partitions, file systems, boot records, other files, folders, etc.
But these Physical drives are often prone to corruption and there can be various reasons behind this corruption. So, before jumping into the methods to repair the VHD file let us find out the reasons behind the VHD file corruption.
Common Causes of VHD File Corruption
There are several reasons that can cause corruption in the VHD file and some of them are:
- Virus Attack: Virtual Hard disk files might get corrupted or damaged due to a virus attack.
- Due to the Antivirus Program: Avoid installing antivirus as they can interfere with the operations of Virtual Machines.
- Improper System Shutdown: Improper shutdown of the system may corrupt the VHD file so always, remember to shut down the system properly.
- Storage Media Failure: The VHD files may become inaccessible or damaged due to corruption or storage media failure.
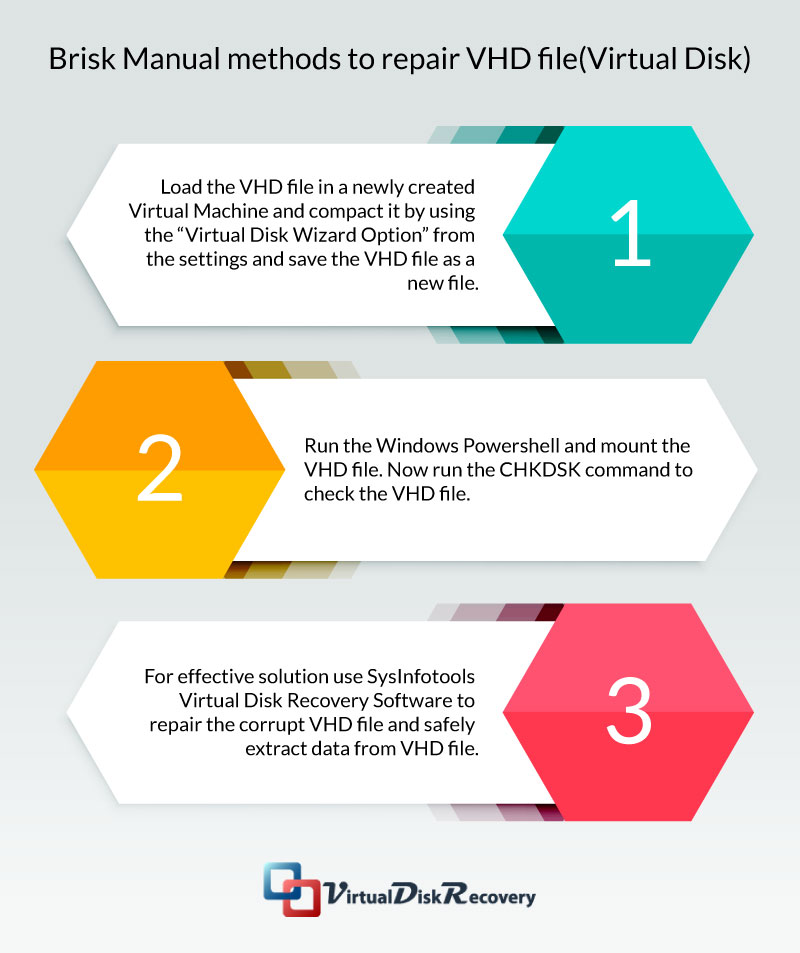
How to Repair or Fix VHD File (Virtual Disk) Manually?
METHOD 1: Manual Methods to Repair VHD Files
1. Create a New Virtual Machine
- Launch your virtualization platform (e.g., Hyper-V Manager, VMware).
- Generate a new virtual machine.
- Add a new hard disk to this virtual machine.
2. Link the Corrupted VHD File
- Go to the Settings of the virtual machine.
- Locate the hard disk settings you created.
- Browse and attach the corrupted VHD file that you’re attempting to repair.
3. Use the Virtual Disk Wizard to Compact the VHD File
- In Hyper-V Manager, click on the Edit Disk option.
- Select the corrupted VHD file from the disk settings.
- Open the Virtual Disk Wizard and choose the Compact option.
- During the compaction process, make sure to select the option to Convert it to a Fixed-Size Virtual Hard Disk. This step restructures the VHD file, potentially resolving size-related corruption issues.
4. Save the VHD File as a New File
- After the compacting process is complete, save the updated VHD file with a new name to preserve the original file as a backup.
- This newly saved file will often have resolved the underlying issues causing the corruption.
5. Test and Mount the Repaired VHD File
- Copy the repaired VHD file back to its original server or environment.
- Try mounting the VHD file to ensure it loads correctly.
METHOD 2. Checking the Integrity of a VHD File Using PowerShell
1. Open Windows PowerShell with Administrator Rights
- Press
Win + Xand select Windows PowerShell (Admin). - Running PowerShell with administrator privileges ensures proper access to perform the mounting and repair process.
2. Define the VHD File Location
- Specify the location of the corrupted VHD file by assigning it to the
$VHDNamevariable. - Example:powershellCopyEdit
$VHDName = "V:\serverx.vhd"
3. Access the MSVM_ImageManagementService
- Use PowerShell to get the
Msvm_ImageManagementServiceclass. This class is part of the Windows Management Instrumentation (WMI) service for managing virtual machines. - Command:powershellCopyEdit
$VHDService = get-wmiobject -class "Msvm_ImageManagementService" -namespace "root\virtualization" -computername "."
4. Mount the VHD File
- Mount the VHD file using the
Mountmethod of theMsvm_ImageManagementServiceclass. - Command:powershellCopyEdit
$Result = $VHDService.Mount($VHDName) - If the command is successful, the VHD file will be mounted to a drive letter, making it accessible for further actions.
5. Run the CHKDSK Utility
- Once the VHD file is mounted, determine its drive letter (e.g., D:).
- Use the CHKDSK utility to scan and repair file system errors within the VHD file.
- Command:powershellCopyEdit
chkdsk X: /f /rReplaceX:with the drive letter assigned to the mounted VHD.
6. Detach the VHD File (Optional)
- After running CHKDSK and repairing the VHD file, you can detach it to use in its original environment.
- Use the following command to detach the VHD:powershellCopyEdit
$VHDService.Detach($VHDName)
REPAIR CORRUPT VHD FILE Using Professional VHD Recovery Tools
As everything has its pros and cons likewise using manual methods also has its cons. To use the manual method you need to be a pro in the technical field and to avoid that Vdiskrecovery has come up with the best and most efficient recovery tool known as ”Virtual Disk Recovery” It is used to recover and restore corrupt VHD files easily. Some of its prominent features are
- It helps in the recovery of complete data from Corrupt VHD files.
- This VHD recovery software has three recovery modes; Standard, Advanced and
- The VHD Repair Tool has its demo version for free download So, that users can evaluate its performance.
Also read: Virtual Machine Error 32788
Conclusion
Through this blog, I have tried to describe the reasons behind corrupt VHD files and the ways or methods to repair the VHD file manually. For non-technical users, I have mentioned a VHD recovery tool. Hope all these methods help.
If you have any queries regarding the same or if you know any other method to repair or resolve the VHD file then kindly let me know In the comment section below. Till then Keep Reading.